Eventhough I wasn't in the judges top 10, I was Amanda's pick over at the CSI project!

The ladder was also featured at My Backyard Eden!

Thank you lady's for having such fun and inspiring blogs!


 I was inspired over at House of Smith's and would have copied her entire pantry if I could have. But I still wanted to be somewhat original. I really wanted to buy wallpaper, but there were a few reasons I didn't go that route; 1) I could really only order if off line, and I am one of those people that has to see it first before I buy it, and 2) I wasn't going to pay upwards of $30 a role with a 2 role minimum to only cover half of the pantry! I also WAS NOT going to paint the pantry. Don't get me wrong, I love paint, but Mr. Husband and I paid a pretty penny to have the entire interior of our house painted... so I'm not about to paint the walls or shelves just yet!
 After figuring out how long I needed the paper to be, I taped it together so I could just cut strips when I was done Mod Podging the fabric on....
 Flipped over the contact paper, and Mod Podged! I thought this was going to take forever... but really only took about 20 minutes.
 While it was drying, I decided I should probably empty out the pantry... and holy monkeys! I had no idea we had that much stuff hiding in the pantry, for two people no less...


 Then to kind of cap it off, I added some decorative trim to the very top after spray painting it with "Heirloom White." As a side note, I also ended up adding clear contact paper to our shelves. With the jars and baskets I was going to end up using, I didn't want to have to deal with scratches.
 Then the rest was simply a matter of collecting Jars, and buying some jars and wire baskets at Crate and Barrel (with leftover wedding gift cards). I couldn't be more pleased with how it turned out!
  A close up of the scrapbook paper with decorative molding...
 I was so excited to finally be able to use my Pink mixer as a decoration... she hated her cabinet home!
 The Pasta jars were sitting on our counter, but I decided they would be much more functional in the closet; we wouldn't have to worry about always keeping them full just for decoration!
 I also took this idea from House of Smiths.... I went to our Ikea and used that jar to house the vegi oil... I hate those plastic containers they come in!
 I am a cereal fanatic, so much so that we typically have like 7 different kinds of cereal at a time. So hopefully having just four containers will control my cereal collecting habits. Above the cereal I have my sprinkle collection, and used a cake stand I already had, added a layer with a candle holder and a wooden disk to give it a tiered effect...


 and AFTER!!!

 Okay, now we're back to rated G :)
 We couldn't have done any of this without my dad... seriously... he saved us at least $1,000 on the sprinkler system alone... (he wouldn't look at the camera... he was apparently too busy helping us dig a massively deep hole under concrete. The nerve of some people)
 Mr. Husband making sure everything worked okay...
 But here's what happens when you go PG... you get a crazy sunburn!
 The next week was phase 2. We had to dig all the trenches for the sprinkler system in the backyard. I quit on this one pretty early because I just can't stand the heat, but Mr. Husband was awesome. After he laid down the pipe, he made this happen!


 Then this past weekend, my Birthday weekend, we had rocks and plants delivered (no grass yet). After I had already had everything delivered, like a dummy not planning well, I had found out that we shouldn't have the grass planted until the beginning of October. Well, I wanted everything done next weekend, which is why I spent my birthday weekend planting trees and bushes!! I was furious, but oh well... at least we finally will get a few weekends to rest!


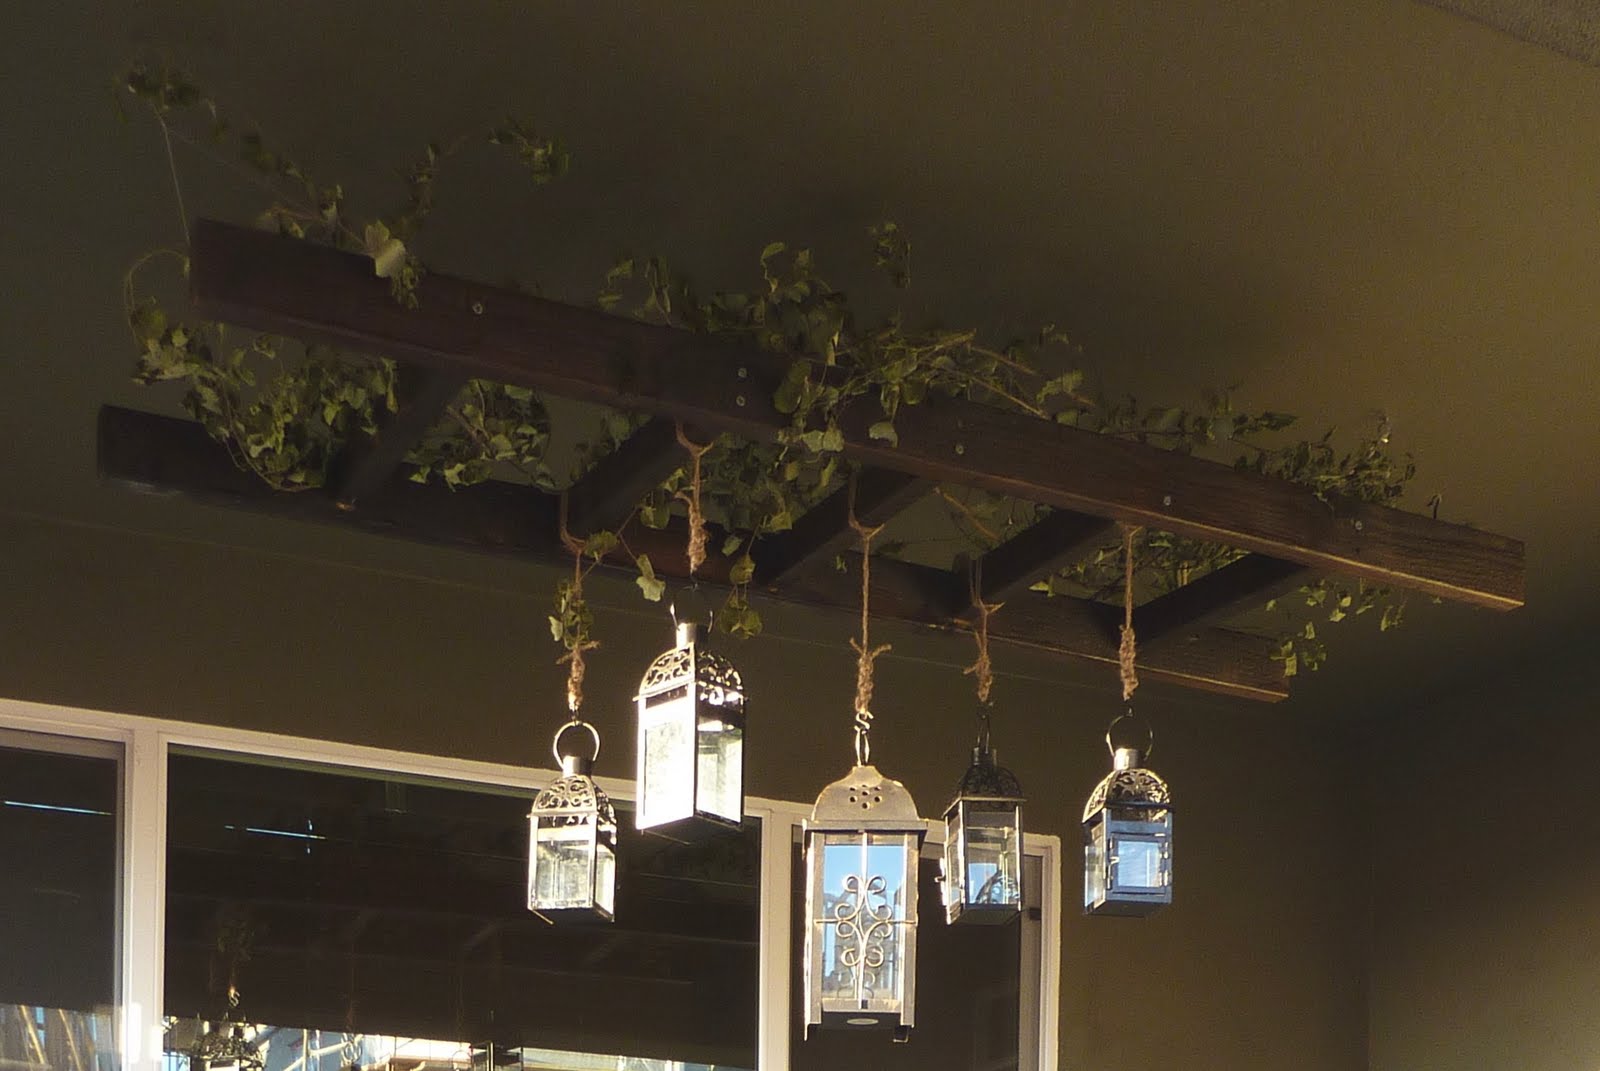
 So then I kept walking around, and died again. I loved the lanterns hanging from the jute.. sooo Pottery Barn-ish!


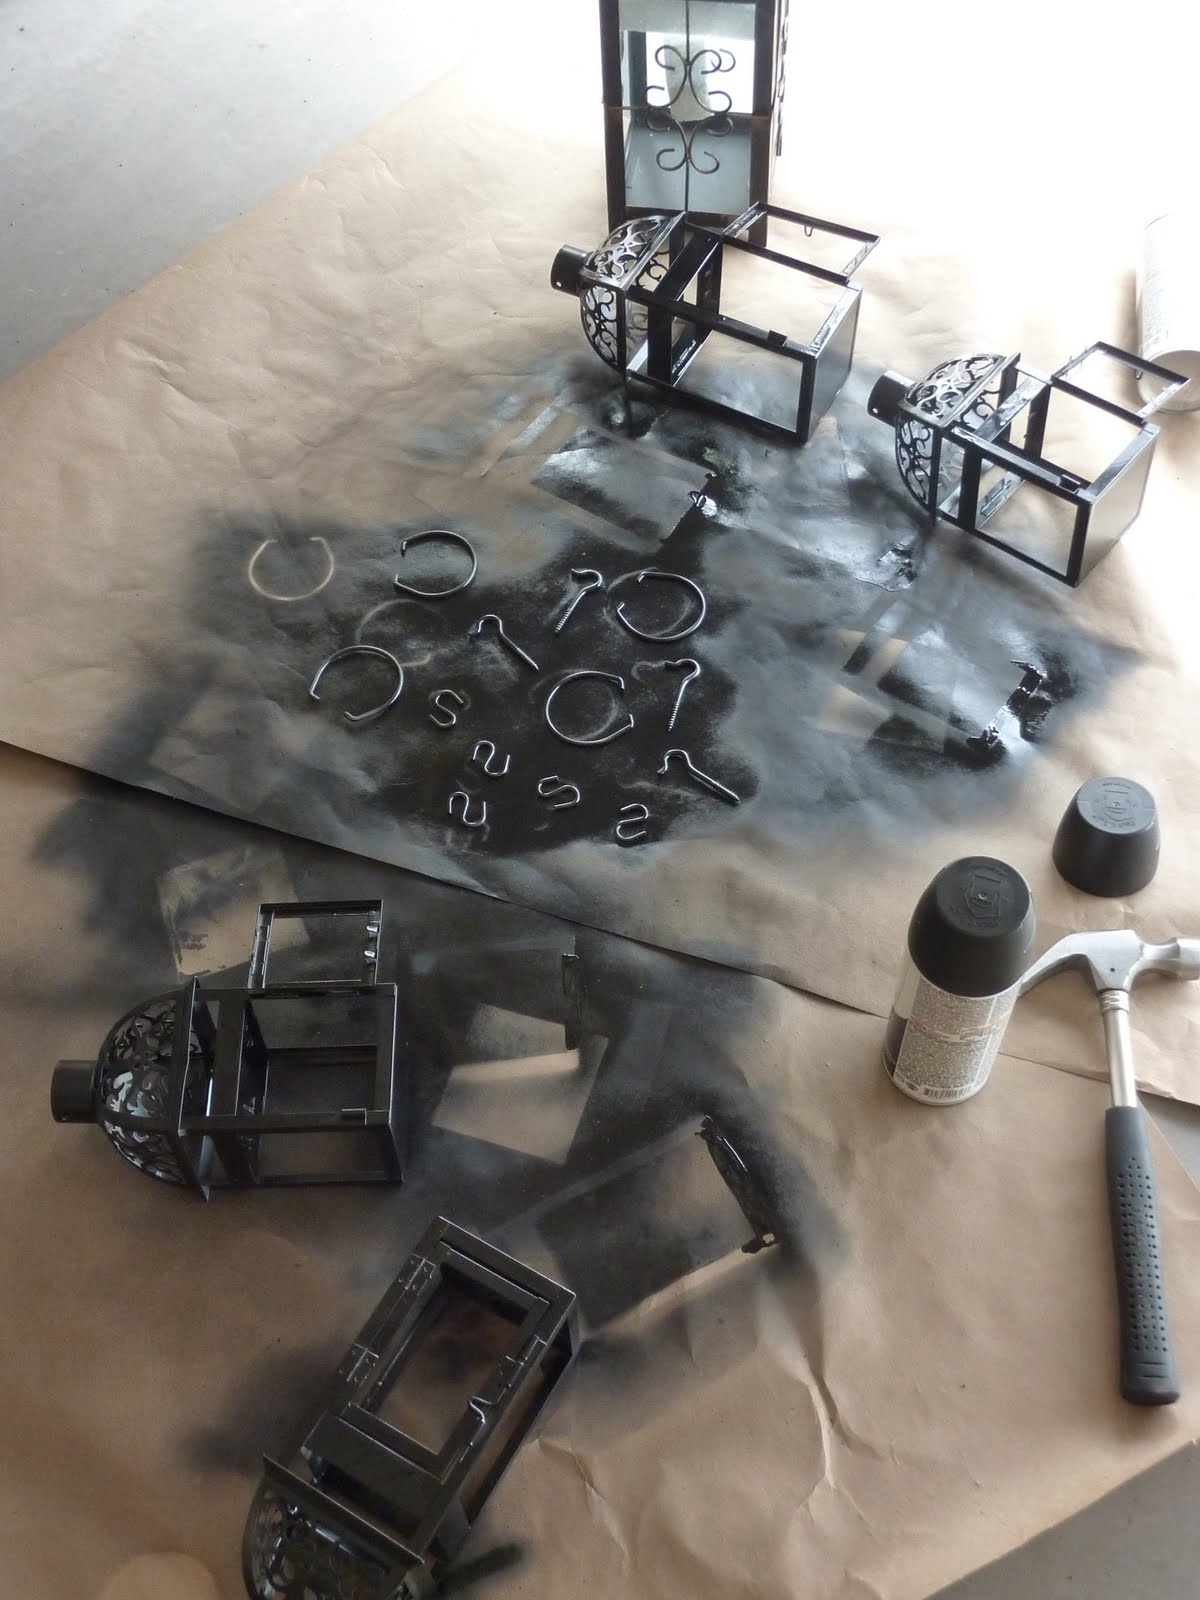


 I had finally finished and was ready to hang it up, but as expected, we had crazy winds... So I opted to wait one more day. It killed me!!!
 But finally, here she is!


 Using elements from Off The Beaten Path by Jennifer Barrette