Sunday, October 24, 2010

Spray Painted Computer Mouse

This project was so easy, everyone should do it. Seriously... it will make you smile when you blog (if you use a mouse:) )

I really really wanted a pink wireless mouse for my office, but everywhere I looked, they just had a really dark pink. I did end up finding a light pink wireless mouse, but I was not about to pay $60 for it.

So while looking at Target I found a blue wireless mouse on sale for $13. I can totally live with that.

Then I got home, and said "D, you should totally spray paint this". So that's exactly what I did. I sat on the couch and taped the entire mouse off with painter's tape while Mr. Husband watched football. He doesn't even ask what I'm doing anymore... He just smiles and shakes his head :)

I know sometimes he's thinking "What did I get myself in to!!" :)

Here's what she started out as....

Here she is taped off... really wasn't as hard as I thought it was going to be.

Then I primed it. I think this is probably the most important part, as it doesn't allow the paint to scratch off as easily. (I've used this mouse for a couple of weeks, and no chips or scratches yet)

And here is the final result! Yes, if you look real close it kind of look like she has a sand paper , grainy coating. Of course the spray paint I bought was somewhat defective... It was almost like it was spitting out silly string. Other than the texture, I was more than pleased with it!

Think of all the other things you could do with spray painting a mouse... seriously... someone try it with a stencil!


Officle Rug

While shopping for "officle" decorations, I came across this lonely rug. You know how I knew she was lonely? She was on clearance for $2 ....

I immediately thought of a conversation with Mr. Husband's co-worker who told me she put a rug in her officle, so f course I scooped this little find right up!


I originally intended to just cover the outsides of the rug, but as always, I deviated from the plan!

I started by cutting strips to cover the outside of the rug, and then hemmed only one side of them. This was the only sewing I did for the entire rug.

I really liked the jute part of the rug, but I just loved this Amy Butler fabric so much better :) So I cut my rectangle and used witch stitchery to bond the fabric to the rug...

I then used witch stitchery again to bond together the ends of the fabric strips together at 45 degree angles...


I then flipped over the outside (with the sides together) and ironed it down with the stitch witchery stuff (yet again). One more flip of the entire rug and I hot glued the fabric to the underside of the rug.
Here's how she turned out!
And here she is in the officle :)

My officle is almost as awesome as my Scrapbook room, sigh :)


Wednesday, October 13, 2010

Front Porch Sign

I can't believe it's been almost two weeks since my last post! Hopefully that won't happen again. This new job has had me working during the day and then coming home to learn more about material I needed to know at night, so needless to say the fun stuff got put on hold :(

Don't worry though... I completely decorated my officle (next post) :)

Anyways... our front porch was looking dull... a little too dull... and after reading some tutorials from the Fabulous Miss Mustard Seed (Mustard Seed Creations) I decided I wanted to tackle our own sign.

A couple of months ago, a friend of mine asked me to grab some palates (we have them all over the place because of all the new houses going up). So I thought "D, you should grab one for yourself just in case." So glad that I did! I tore off some of the wood slats, glued them together, and it gave me the foundation for the sign. These boards worked great, because they were all beat up.... which is what exactly what I wanted.

Then I used the Cricut to cut own my stencil just to make sure they were the size I wanted

I then randomly brushed a "antique white" paint, to help give it a type of aged look... Just enough to where some wood was still peeking through...

Then traced on the letters...

Then PAINSTAKINGLY painted in the letters... Let me just say this... I'm a pretty patient person and typically like projects that are very meticulous in nature... but this got the best of me! I don't know how some of you sign makers do it! It took so long!

After painting in the rest of the letters, I then went ahead and sanded down in random places, then applied a coat of walnut stain over the entire sign, and it turned out exactly as I'd hoped :)

I drilled my holes and attached the signs together with hemp, then topped it off with a little garland from Hobby lobby... and got this :)


One last look!

Now here's my issue... it's too heavy...lol. Of course right?!?!? I tried using one of those 3m sticky hooks outside, but when I tried to put it on it came right off... I just talked to my dad, and pretty much said that because our house is stucco, if I try and nail or screw something in I could crack a whole piece of the stucco off...
So does anyone have any ideas?!?

Tuesday, September 28, 2010

Tissue Box

For about that past month and a half, I've been a little bit stressed out with a job I was applying for at work. My parents had always made the mistake when I was growing up by bribing me with a certain amount of money for every "A" I had gotten on a report card. So now, whenever I do something good or have a accomplishment, I feel like I need to be rewarded....

So I played my favorite game with Mr. Husband. It's a game I like to call "Let's make a deal". One night I said to Mr. Husband, "Mr. Husband... if I get this job, then I get to buy/make stuff to decorate my officle (office + cubicle) "D" style". After little convincing, he agreed, but I still needed to get the job...

Well................................... I got the job, and I'm beyond excited :)

Here's the plan... some Amy Butler fabric, fake Peonies in a vase, a rug, some picture frames, a wall organizer if I can find some cubicle hooks, a desk organizer, and a tissue box ...

Of all things, I opted to start with the Tissue box :)

I always want to have tissue at my desk, but I think the boxes they come in are just so ugly. I admit, they are now trying to make a effort with different designs on the boxes, but they're still just dreadful. Right now, I just use napkins from our cafeteria... can you believe that?!?

Anyways, I started with a tissue box just to make sure I had the right measurements.

I was originally going to mod podge scrapbook paper on a plastic tissue box cover (assuming I could find one), but then I thought "why don't I just sew it with some thick interfacing?". So I picked out my fabric. I had already picked out some Amy Butler and Heather Bailey fabric for my officle rug redo (next post), but wanted some coordinating fabrics too... so I picked up the big polka dot fabric (Amy Butler) and then a damask-ish fabric that I've had my eye on FOREVER from Hobby Lobby.

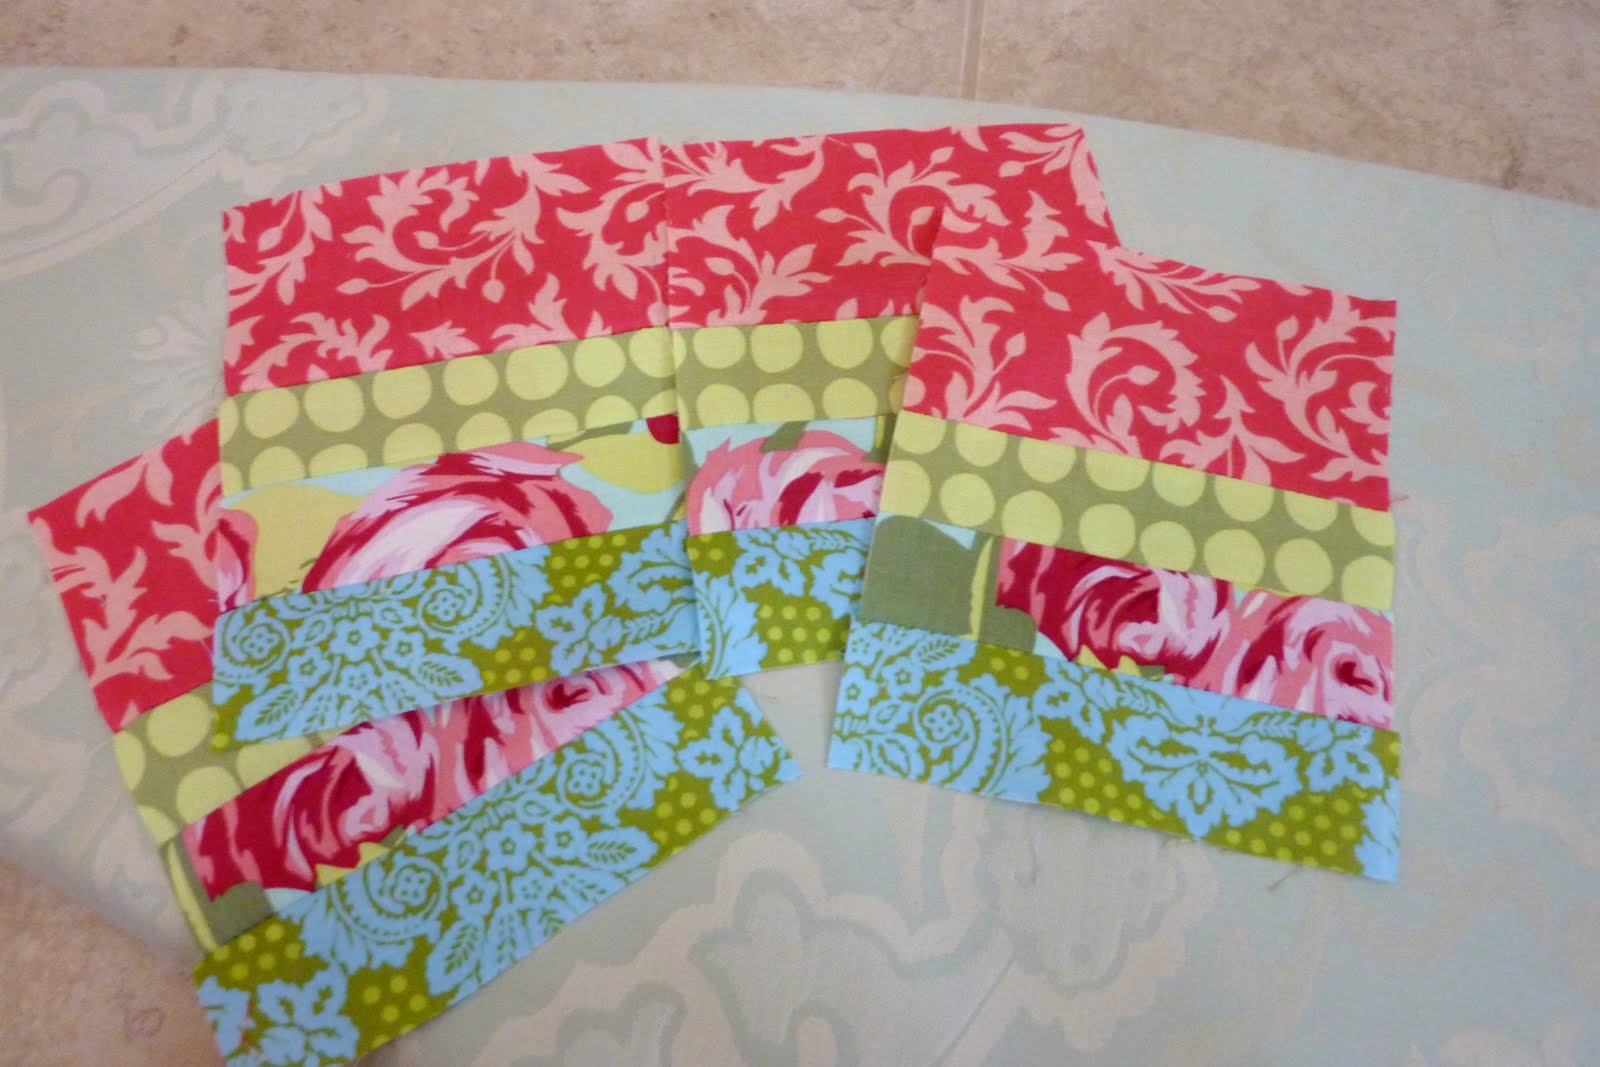
Then I cut three of the fabrics to a one and a half inch width, and the top fabric to a two inch width (4 of each).

Then sewed the four strips of fabric together, so I would have four sets...

Then I pressed the seams down so they wouldn't bunch up so much...

and now you have your four sets you're almost ready to sew together.

Then I measured the interfacing, and had it just a smidge bigger than the sides of the tissue box.

This part was kind of tricky... I ironed on the interfacing to the first side, and then lined all of the sides up when ironing on the interfacing just to make sure they all matched up to each other.

For the top of the box, I ironed on the interfacing and then used a template to have a decorative opening for the tissue...


Then I sewed all four sides to the top...

pinned together the sides and sewed them together...


Now here is where you hope all of your sides match up... I'm still practicing how to sew straight lines, so the mere fact that I even got to this point still amazes me. I only had one side that was just a little bit off :)

And now for the best part... flip it inside out!

I loved it, but was still wanting a pop of turquoise, so I added this turquoise trim with a few rhinestones here and there... and here's how it turned out!


How fun is the top!?!

The best part is, whenever the tissue runs out, you just switch out the box... no more ugly tissue boxes for this girl!


Linking up to CSI's Turquoise challenge!

Visit thecsiproject.com


Tuesday, September 21, 2010

More Patio Stuff....

After finishing the Autumn Tree for the porch, I still wasn't happy with how it was looking. I do still plan on adding some fake hay and pumpkins, and also switching out the chair covers.... but it's still missing a little something...

So I sat and thought and thought and thought.... and while sitting and thinking on the porch I just kept staring at our light pole. I'm obsessed with light poles, lamps, lanterns, the like. I was so excited when we noticed these light poles when we were first started searching for our home, because you just simply do not find these little characteristics in Arizona. (Down the street in another development, they have the "Sesame Street" light poles... obsessed with those too!)

Then I went inside and watched Sherlock Holmes with Mr. Husband (I swear if I could have any chosen any era to live in, it would have been the early 1900's... the decor and the big dresses the women wore just make me drool!)... Towards the beginning of the movie, I saw this, and the light bulb went off!


So I left Mr. Husband and went to work. I started off with this lantern which we had bought from Crate and Barrel.

and added some lettering to it, just like in Sherlock Holmes. Looked super cute, but I wanted to make it a little bit more unique...

So I took out my Cricut, and my "Summer in Paris" cartridge. This is my favorite cartridge so far... and I bought it for only $12 from Joannes during national scrapbook month! I hadn't tried this cutout before, but it is a 3d chandelier cut out.

So I used some thick cardstock and had the Cricut cut out the 3d chandelier, then spray painted it with a brushed gold color.

I then thought to myself "D, how can you waste more of your Saturday afternoon? I know, you can rhinestone it of course!!"


Then I hung the chandelier with wire at the top of the lantern... Loving it!

I originally was going to hang the lantern from a Shepherd's hook I had leftover from the wedding, but then decided it I wanted it to really look like a light pole. A few months ago I had bought one of those cabinets that has really long legs that is supposed to go over a toilet. Well, I just wanted the cabinet part, so I rigged it in a way where I didn't use the legs, and saved them because I new I could use them for a project some day...
So I filled a planter with two bricks (for stability and weight), stuck one of the legs in, and covered the rest with potting soil...

Then hot glued the lantern to the top of the leg...

Then to make it look a bit more Autumn-y, I added some twigs from Hobby Lobby, and here's the end result!


I love that the Chandelier, and the font of the lettering gives it a little bit of a haunted look. This is probably as close to Halloween decorating as I will get for the year!


One more look! I love how she turned out! I think she needs a orange bow just to finish it off :)

And here's a preview of how I wasted the rest of my weekend! Can't wait for this post!